

How To Guide: Full Body Tracking on Your Quest 2 IS Possible!

With the Quest 2’s affordable price point and more and more people getting into VR, more users are researching how they can get the most out of their Quests, including full body tracking.
Unfortunately there is no easy, plug and play way to do this as the way a Quest tracks your play space, hands and headset is way different from how a PCVR headset does, but technically there are solutions out there.
I do want to warn you that this method will work but it’s not going to be perfect, there’s a lot of troubleshooting you may have to do, calibration can be finicky and it’s not going to be cheap. Expect to spend at least $600+ dollars to get this working, since you will need base stations and of course trackers.
If I haven’t scared you off by now, then let's do this! Let me give you a quick rundown of what you will need and why, followed by how to get all of this set up.
What Do I Need?
You’re going to need at least three trackers, one for each foot and one for your waist. You can technically have as many as you want for elbow and knee tracking, etc, but this may be limited by the game or program you want to use full body tracking in. VR Chat for example, allows up to 10 point tracking (your headset and controllers count as three points of tracking, by the way).
You can get either the 2018 trackers which have a blue logo or 3.0 trackers which have a black logo, or any other third party tracker as long as SteamVR is able to detect it.
You’ll also need straps for the trackers to attach them to your body, you can find a variety of brands on Amazon, some of which include their own battery banks so your trackers can stay charged as you play!
You’re also going to need base stations:

Technically you only need one but I highly recommend getting two base stations to make sure that you will be able to get tracking from more than just one angle. With only one base station, if you simply turned around, you’d lose tracking. Two base stations can cover your space much more effectively. I recommend getting 2.0 SteamVR base stations because no matter what trackers you end up buying, they will work with them, plus you will get better tracking and less glitching vs what you can get from the 1.0 HTC base stations.
As far as software requirements, I highly recommend getting Virtual Desktop for connecting to your PC vs Airlink for a couple of reasons I’ll get into later. You can get Virtual Desktop is $19.99 on the Quest store.
Make sure you also download and install SteamVR on your PC, OpenVR Space Calibrator and you may also want OVR Advanced Settings for play space customization (more on this later).
Note that full body tracking will only work with games bought on SteamVR, not on Quest standalone, so make sure you have a gaming PC or a PC that is strong enough to handle playing VR games. Unfortunately this means that yes you do need a computer, as this will not work standalone.
Setup
First I’m going to quickly run you through setting up your base stations. If you are using HTC Vive 1.0 base stations, change the channel (or the letter on the front) on one base station to b and the other to c. Do this by pressing the button on the back to cycle through the channels.

If you are using 2.0 base stations they should be set to different channels automatically by SteamVR, you can check this by hovering over them in the SteamVR window.

You will also need a way to turn your base stations on or off since you don’t actually have a lighthouse based headset. If you have an android phone I recommend the app Lighthouse PM or BS Companion if you are on iOS.
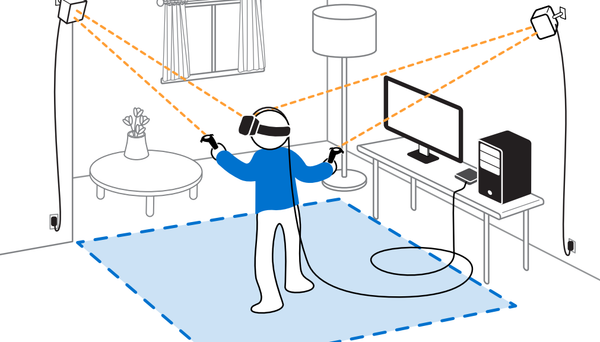
Mounting them on the wall is best vs on something standing like a tripod because if you get any vibrations it will totally throw your tracking and calibration off. The best position will be opposing corners of your room, placed above your head and tilted slightly down, also making sure they can see each other. All you need to do is plug them in using the power cord, they don’t attach to your computer in any way nor need bluetooth.
Once the light at the top of the base stations turns green, that means they are on. You should now see them show up in SteamVR and you should be ready to continue with the next steps.
Trackers
Now we need to set up your trackers. You need to turn them one at a time and label them appropriately within SteamVR. Each tracker also comes with a dongle that needs to be plugged into your PC. I recommend purchasing something like a USB hub to plug them all into to save space on your computer.
To make life easier, physically label your trackers and dongles as well so you can keep track of which dongle pairs to what tracker, and what tracker attaches to what body part.
Plug in one dongle into the hub or your computer, and turn on one tracker by pressing the middle button for a second or two. In Steam VR, right click on the greyed out tracker and click, pair tracker.
Click 'I want to pair a different type of controller', and select the tracker. Press and hold the middle of your tracker until it starts blinking blue. The light will turn from blue to solid green once its paired. On Steam VR, you should see your tracker as a solid blue.
In the Steam VR settings we are going to label this one as left foot, so take a label sticker or something and mark both the dongle, and the tracker associated with it.
We're going to do the same for the next tracker. With the left foot dongle and tracker still plugged in, proceed to plug in the next dongle, turn on the next tracker, and pair in Steam VR. Label this one as 'right foot' both in the steam settings and with your physical labels on the dongle and tracker itself.
Finally last step, do the same but with your waist/hip tracker. Plug in the final dongle, turn on the final tracker, and pair it. Label as hip/waist in Steam VR and you should have both your controllers and your trackers successfully running and usable all at the same time.
It's good a good idea to check for firmware updates for your trackers, but they will have to be directly plugged into your PC with the provided USB cable. To update your tracker plug in the first one directly to your PC, click on the steam settings, go to devices, then update device. You'll see here if your tracker needs updates or not.

Software
If you haven’t already, install OpenVR Space Calibrator so it’ll be ready to go when we need it.
Now we need to connect your Quest 2 to your PC, while you can technically do this for free with airlink, I recommend using Virtual Desktop because of the ‘stage tracking’ setting it has under the streaming section.
Stage tracking which will help a ton when it comes to keeping things synced and calibrated. Without stage tracking, every time you start the Quest or leave the guardian boundary you have to re-calibrate. Virtual Desktop also offers better controller latency and a lot of other settings you can mess around with to tailor your experience.
Make sure you have both the Virtual Desktop app on your Quest and the launcher for your desktop, which you can download at vrdesktop.net. Make sure the desktop streamer is open and has no conflicting issues, then launch Virtual Desktop in your Quest and connect to your computer. Launch SteamVR through Virtual Desktop, and make sure all your Vive trackers are turned off except for one.

Once you enter the Steam home environment, click on the menu button on your left controller and open the OpenVR Space Calibrator on your Steam dashboard.

You should see your controllers on the left side of the list and your tracker(s) on the right. Select the right quest controller and a tracker, then pick slow calibration as this allows it to track for longer but more accurately, then click 'start calibration'.

While calibrating put your tracker on your arm while holding your right controller and move it around slowly in a figure 8 pattern. Your tracker should be calibrated once finished. Now you should be able to turn on your other two trackers and they should automatically be brought in and calibrated properly.

VR Chat
If you want to now use your trackers in VR Chat, bring up your Steam dashboard again and launch VR Chat through it.

Press the y on your controller to bring up the menu, then select the calibrate full body tracking option.

Line up the circles that represent your trackers with your avatars body, strike a T-pose to match, then click the triggers when you’re happy with where things are.

Depending on your avatar you may find that you don’t properly line up with the floor, and this is where OVR Advanced Settings comes in handy. You can use the height offset function in offsets to adjust your height to be higher or lower as needed.

Troubleshooting
Now for some issues you may come across:
Calibration and tracking issues are going to be the most common. You need to prevent your Quest from going to sleep by making sure to change the sleep time in your Quest settings (Settings> Power>Sleep Timer), but you can also put tape over the sensor. If it turns off or goes to sleep, you’ll need to re calibrate all over again.
If you find that the trackers appear off, take off the tracker you used the first time for calibration, and run OpenVR Space Calibrator again with it. If you find that it still seems off keep calibrating again but this time be conscious to move it around in different angles as the more angles it can capture the more accurate it will be.
Other ways to ensure the best possible quality of tracking include covering any reflective surfaces like mirrors, windows, or monitors as they can sometimes interfere with the infrared tracking. Make sure your base stations can actually see each other and are in opposing corners of your play area. Make sure your router is broadcasting at 5ghz as opposed to 2.4ghz. Finally be mindful of the trackers themselves and your headset camera, anything that passes over or covers them can also mess up the tracking.
If you notice your floor height in Steam guardian is different to the floor of your Quest guardian, you might run into some issues where you need to run a SteamVR room setup in order for it to get the proper floor height and scale of your play space.
If you need to do this, run Steam VR through Virtual Desktop and turn on your trackers. While in VR, view the desktop and run the SteamVR Room Setup by typing 'room' into search in your library.

Follow the instructions it gives you but choose 'Standing Room Only', and when you get to the section about setting the height, instead of putting your headset on the floor like it may suggest, continue wearing the headset and enter your height manually instead.

Click calibrate floor then check to see if the SteamVR floor is the correct height by touching it with your controller. If the floor height is not where your controller is touching, run the set up again and enter a shorter or taller value for your height and keep doing this until your SteamVR floor height matches your real life floor height.
---
Congrats! If you've made it this far, enjoy the freedom that comes with completely wireless full body tracking on your Quest 2! Be the envy of your friends in VR Chat, NeosVR, and other social programs!
If you have any additional setup questions I highly recommend checking out and asking over at the mixedVR subreddit, you can find some of the creators and contributors to the OpenVR Space Calibrator there and they are extremely knowledgeable.
coldthefox – Your 1.0’s should be okay, most important will be the positioning (opposite sides of the room so you get full coverage even when you are turning around, etc). Mirrors or highly reflective surfaces like windows can also sometimes mess up the tracking. I also found that I had glitchy tracking when my computer chair was blocking the dongles unintentionally. It’s probably something small but annoying!
justaperson – Not sure unfortunately and I cannot test this as I do not own a Mac :(
can i do all of this with a macOS computer using bootcamp?
Actually, i’m quite curious, how better are the 2.O base stations compared to the 1.0 in term of glitching.. tracking and jitter ?
I got 1.0 base stations but I’m facing plenty of issues even perfectly positioned, so i’m seriously thinking about aiming toward 2.0 base stations for my quest 2 setup.
Thank you in advance and have a great day :p
If you’re having trouble with Steam detecting your base stations make sure you use one of the mobile apps mentioned to turn them on.
If you’re having trouble pairing your trackers, hold the button on your tracker down until it flashes, on Steam VR right click somewhere on the window, go to devices → pair controller → pair another kind of controller if the tracker isn’t the option picked up.